
Using the patches
Before you start: the fungal nail treatment checklist
Ten minutes of preparation removes most of the reasons home treatment goes slowly. Work through this list the evening before you start.
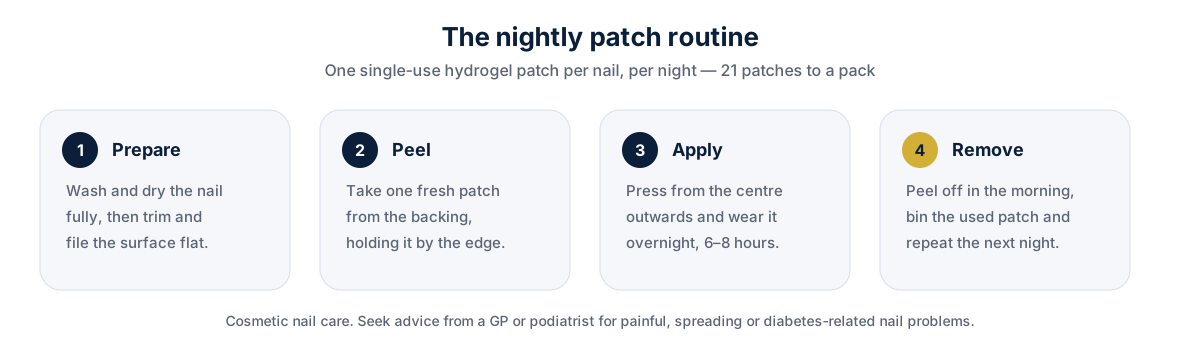
Summary
Confirm the diagnosis is plausible, prepare the nail, gather the kit, pick a consistent daily time, and set realistic expectations about regrowth.
Check first
Rule yourself out where appropriate.
- Not diabetic, and no neuropathy or circulation problems
- No pregnancy or breastfeeding without pharmacist advice
- No allergy to listed ingredients, read the leaflet
- Skin around the nail is intact, not broken or infected
Prepare the nail
The evening before day one.
- Remove all nail varnish and let the nail dry
- Cut the nail as short as is comfortable, straight across
- File the surface lightly to take off loose, flaky material
- Wash and dry the foot thoroughly, including between the toes
Have to hand
So nothing interrupts the daily routine.
- Your pack of hydrogel nail patches and its printed guidance
- Nail clippers and a file to flatten the nail surface
- A clean towel used only for the treated foot
- Antifungal cream if you also have athlete's foot
- Antifungal shoe spray for weekly footwear treatment
Set expectations
A pack covers three weeks of nightly care. The cosmetic result arrives months later as the new nail grows out. Photograph the nail on day one so progress is visible.
When to seek medical advice
Speak to a pharmacist before starting if you take regular medication, or to a GP if the nail is painful or the surrounding skin is inflamed.
References
People also read
Medical disclaimer. This article is general information written for a UK audience. It is not medical advice and does not replace assessment by a GP, pharmacist or podiatrist. Always read the patient information leaflet supplied with any product before use.